- Jun 6, 2023
How To Create Your Own Planner Mockups
How to Create Stunning Planner Mockups with Photoshop
In this step-by-step tutorial, you'll learn how to create beautiful mockups of your physical and digital planners using Adobe Photoshop. Whether you're a seasoned photographer or a beginner, this guide will provide you with the tools and techniques to elevate your planner marketing game.
Step 1: Avoid These 3 Tools 🚫
Before diving into creating your stunning planner mockups, let's talk about what tools to avoid. These tools might seem appealing but often lead to more frustration than results.
Adobe Dimension
Adobe Dimension is part of Adobe Creative Cloud and might catch your eye with its 3D rendering capabilities. However, for planner mockups, it's overkill. The complexities of 3D modeling aren't necessary and can complicate your workflow.
AI Image Generators
AI tools are exciting and evolving rapidly, but they're not yet reliable for high-quality planner mockups. You might find a gem, but more often than not, you'll waste time sifting through awkward, unusable images.
Place It
While Place It offers easy image placements, the backgrounds are often unattractive and inconsistent. The lack of cohesive themes makes it challenging to create a unified brand look.
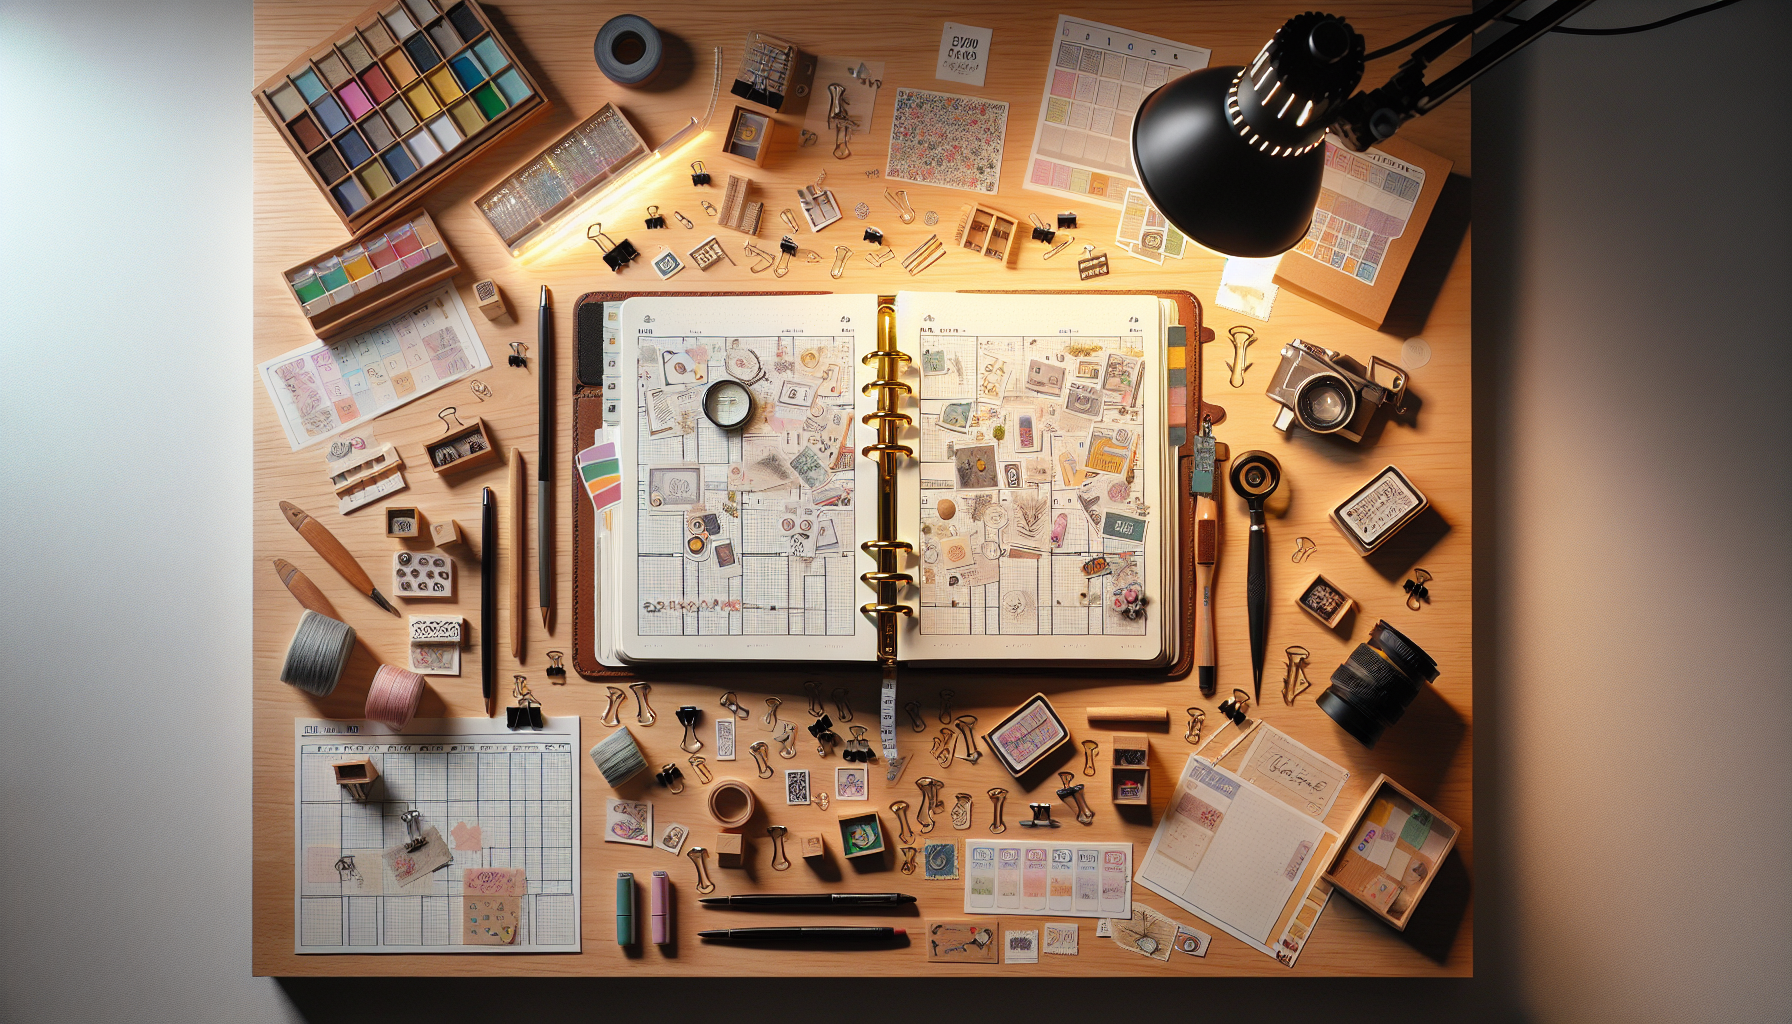
Step 2: Recreate the Amy Landino Planner Product Photo Look 📸
Amy Landino's Good Morning Good Life sales page is a stellar example of beautiful planner photography. Let's break down how to achieve a similar style for your planner mockups.
Analyze the Layout
First, study the layout. Amy's photos use transparent backgrounds, open notebook shots, and a consistent staging style. This creates a cohesive and professional look.
Gather Your Props
To recreate this look, gather similar props. Think about items like:
Paper clips
Stamps
Calendars
Backgrounds
Set Up Your Scene
Arrange these items in a way that complements your planner. Make sure everything is neat and aesthetically pleasing. Consistency is key to maintaining a professional look.
Step 3: DIY Your Own Planner Photoshoot 📷
If you're ready to take the plunge and DIY your planner photoshoot, here's a step-by-step guide to get you started.
Invest in Essential Equipment
While you don't need a professional camera, having the right tools can make a big difference. Consider investing in:
An overhead crane
Quality backgrounds
Lighting equipment
Use Your Smartphone
If a professional camera is out of your budget, your smartphone can suffice. Modern smartphones have excellent cameras capable of taking high-quality photos.
Stage Your Planner
Lay your planner flat and arrange your props around it. Ensure good lighting and take multiple shots from different angles. This will give you a variety of images to choose from.
Consider White Boxes for Product Photography
White boxes can be useful for vertical shots but are less effective for the overhead shots typically used for planners. Ensure your setup allows for overhead photography to showcase your planner effectively.
Outsource If Necessary
If DIY isn't your style or you want professional-grade photos, consider outsourcing. Companies like Suna and Square Shot specialize in product photography and can deliver high-quality images.
By following these steps, you can create stunning planner mockups that rival professional photoshoots. Happy creating!
Step 4: Outsource Your Planner Photography 📸
Not everyone has the time or skills to take professional-grade photos. Outsourcing your planner photography can be a great option.
Find a Professional Service
There are many companies specializing in product photography. Look for services that have experience with planners and stationery.
Suna
Square Shot
Pixc
Communicate Your Vision
Make sure to clearly communicate your vision and style preferences to the photographer. Provide examples of what you like.
Send them a few samples of your planner and any props you want included. This ensures they capture the look and feel you desire.
Review the Photos
Once you receive the photos, review them carefully. Make sure they align with your brand and meet your expectations.
If any adjustments are needed, don't hesitate to ask for revisions. Most professional services will accommodate reasonable requests.
Step 5: Use Photoshop Smart Objects for Easy Mockups 💻
Photoshop Smart Objects are a powerful tool for creating planner mockups. They simplify the process and produce professional results.
Find Smart Object Templates
Search for Smart Object templates on platforms like Adobe Stock and Creative Market. Ensure the template is compatible with Photoshop.
Look for templates that match the style and layout of your planner. This will make the customization process smoother.
Customize the Smart Objects
Open the template in Photoshop. Double-click the Smart Object layer to edit it.
Replace the placeholder image with your planner design. Save the changes to update the mockup automatically.
Adjust Colors and Elements
You can easily change colors and other elements within the Smart Object. Double-click the color layer and select your desired color.
This flexibility allows you to match the mockup to your brand's color scheme. Experiment with different color combinations to find the best fit.
Save and Export
Once you're satisfied with the mockup, save your work. Export the file in the desired format, such as JPEG or PNG.
Use these high-quality images for your marketing materials, website, and social media. They will help showcase your planner professionally.
Step 6: Utilize Canva Templates for Quick Mockups 🖼️
If you're looking for a quick and easy way to create planner mockups, Canva is a great option. It offers user-friendly templates that anyone can use.
Search for Templates
Start by searching for planner mockup templates on Canva. Use keywords like "planner mockup" or "iPad mockup."
Select a template that suits your needs and click "Customize this template."
Drag and Drop Your Images
Upload your planner images to Canva. Drag and drop them into the designated areas of the template.
Resize and adjust the images to fit perfectly within the mockup. Canva's drag-and-drop interface makes this process simple.
Layer Adjustments
Sometimes, you may need to adjust the layers to ensure all elements are visible. Use the "Arrange" tool to bring elements forward or send them backward.
This is particularly useful if your image overlaps with other elements in the template. Ensure everything looks cohesive and professional.
Save and Share
Once you're happy with the mockup, save your design. Canva allows you to export in various formats, including JPEG, PNG, and PDF.
Share your mockups on social media, your website, or in promotional materials. They will help attract attention and showcase your planner beautifully.
Step 7: Create Mockups with Flat Photos Using Clipping Masks 🎨
Creating mockups with flat photos using clipping masks in Photoshop is a great way to achieve a polished look. This technique allows you to seamlessly integrate your planner designs into any background.
Prepare Your Canvas
Start by opening Photoshop and selecting the rectangle tool. Draw a rectangle over the area where you want your planner design to appear.
Use the selection tool to adjust the rectangle, ensuring it aligns well with your desired area. Precision isn't crucial as you can always refine it later.
Transform and Adjust
Once your rectangle is in place, use the command T (transform) function. This allows you to resize and shape the rectangle to fit perfectly.
Adjust the corners and edges until you are satisfied with the placement. A slight margin of error is acceptable, especially if you have a white border.
Apply the Clipping Mask
Next, place your planner design over the rectangle. Right-click on the design layer and select "Create Clipping Mask."
This will clip your design to the shape of the rectangle, making it appear as though it is part of the background.
Fine-Tune the Placement
Rotate and adjust your design to fit perfectly within the clipped area. Use the transform tools to make any final adjustments.
Once everything looks good, your flat photo mockup is complete!
Using clipping masks in Photoshop is a simple yet powerful way to create professional-looking planner mockups. Give it a try and elevate your planner presentations!
Return To Blog
Blog Posts
Pretty Fabulous YouTube Channel
It's LIVE + FREE
AI Selfies 101
Never waste thousands of $$ on a photoshoot ever again
Give yourself an AI photoshoot to match any branding you have!