- Jan 16, 2025
Step-by-Step Guide: Inserting an SD Card into Your DJI Osmo Pocket 3 📸
DJI Osmo Pocket 3: How to Insert an SD Card (Beginner's Guide 2025)
So you've just unboxed your shiny new DJI Osmo Pocket 3, and you're excited to start recording. But wait! You hit record and see a message that leaves you scratching your head. Don't worry; this guide will walk you through the essential step of inserting an SD card correctly. Let's dive in!
Step 1: Gather Your Supplies 🛒
Before you start, make sure you have everything you need. You’ll require:
A compatible micro SD card (not a regular SD card!)
An SD card reader for transferring files
It's crucial to select the right micro SD card. Look for one that specifies UHS-3 for optimal recording speed, especially if you plan to shoot in 4K at 60 frames per second. Trust me; using a card with the right specifications will save you from error messages later on.
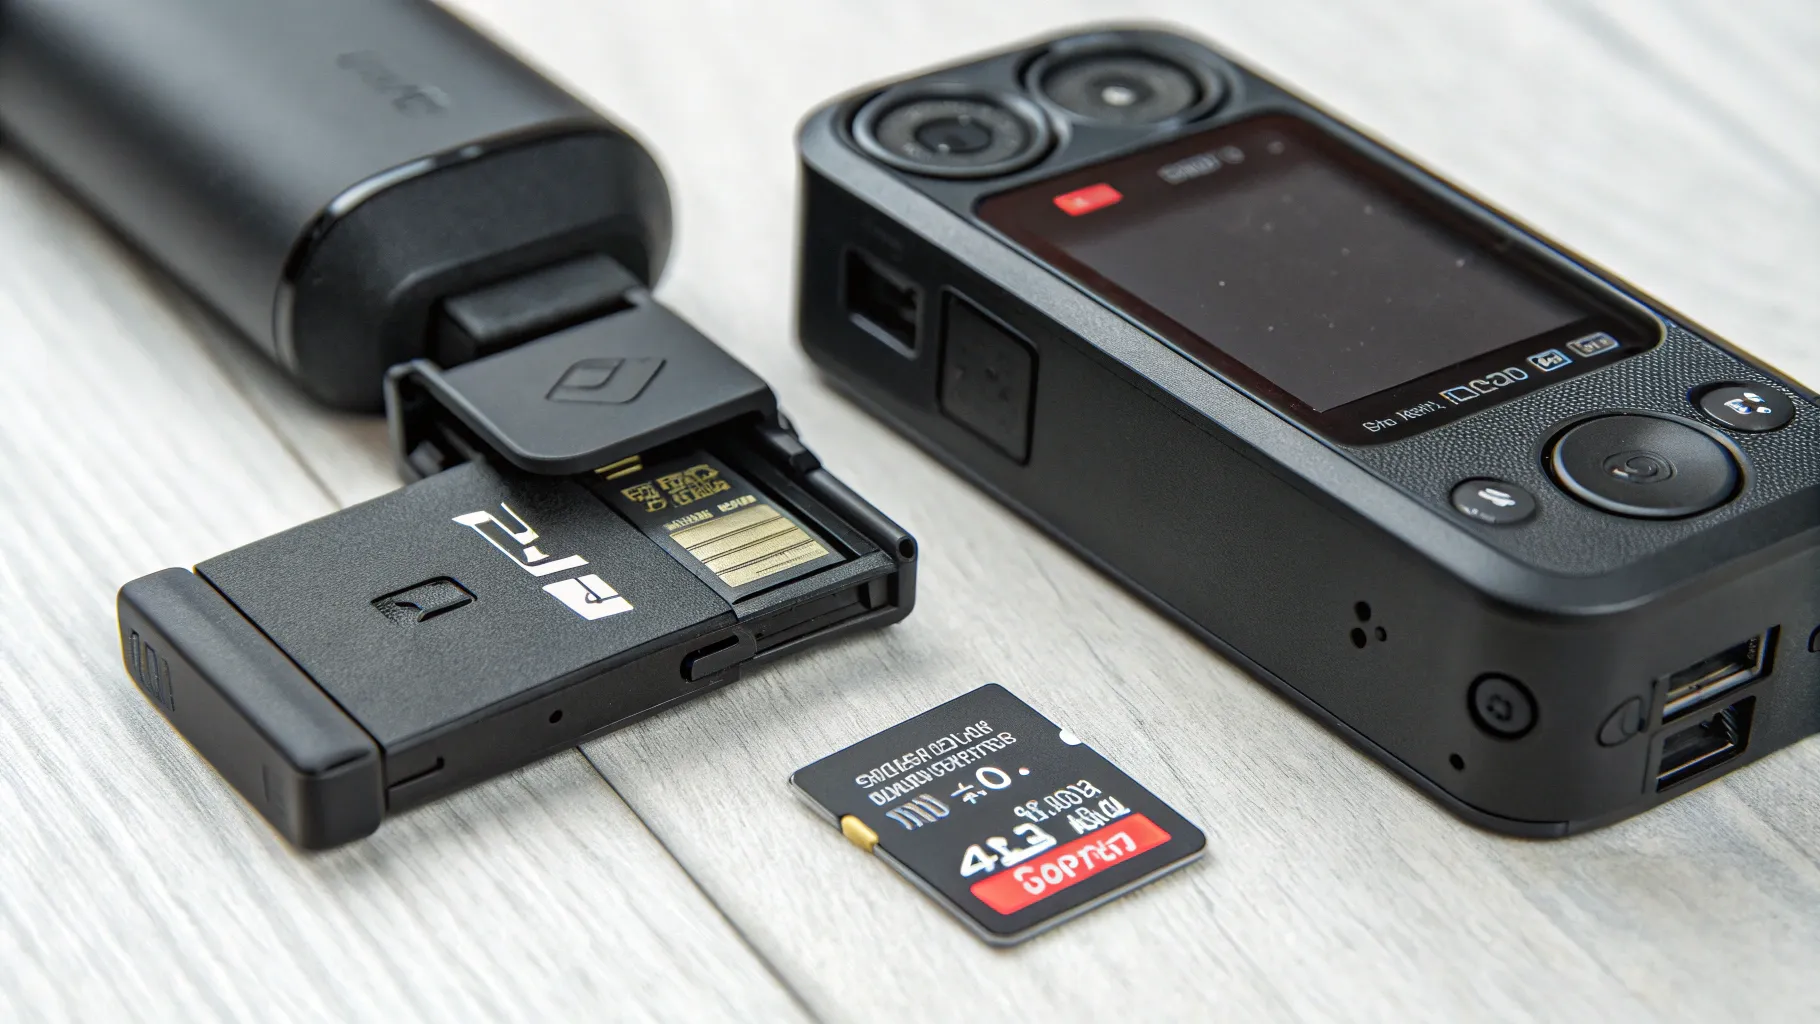
Step 2: Locate the SD Card Slot 🔍
Now that you have your micro SD card ready, it's time to find the slot on your DJI Osmo Pocket 3. You’ll find it on the side of the device. Here’s how to locate it:
Hold your Osmo Pocket 3 with the screen facing you.
Turn it to the side where you see a small slot.
That's where your micro SD card will go!
Step 3: Insert the Micro SD Card 💳
Inserting the card is straightforward, but it might feel a bit odd at first. Here's how to do it:
Take your micro SD card and look for the small gold contacts on one side.
Insert the card into the slot with the gold contacts facing down and the card angled slightly.
Push it in gently until you hear a click. It might feel like you’re breaking it, but don’t worry! That’s just how it’s designed.
Step 4: Format the SD Card ⚙️
After inserting the card, you’ll likely get a message indicating that the card is not formatted. Here’s how to format it:
Swipe down on the screen until you see the settings menu.
Look for the icon that resembles an octagon and select it.
Scroll until you find the “Format” option.
Tap “Format” and swipe to confirm. This action will prepare your card for use.
Step 5: Remove the SD Card When Needed 🔄
When you’re done recording and need to remove the SD card, follow these steps:
Press the card gently; it should click and pop out.
Handle it carefully to avoid damage.
Next, you can insert it into your SD card reader to upload your footage to your computer.
Step 6: Recommended SD Cards 🏅
To ensure you have the best recording experience, here are some recommended micro SD cards:
SanDisk Extreme Pro UHS-3
Lexar Professional 1000x UHS-3
These cards are reliable and provide fast read/write speeds, which are necessary for high-quality video recording.
Step 7: Tips for Managing Your SD Cards 💡
Here are some tips to make your life easier when using micro SD cards:
Consider buying multiple cards if you plan on recording a lot. This way, you can swap them out and avoid running out of space.
Always format your SD card in the DJI Osmo Pocket 3 before the first use for optimal performance.
Keep track of your micro SD cards; they are tiny and can easily get lost!
Conclusion: You're Ready to Record! 🎥
Now that you know how to insert and manage your SD card, you're all set to start capturing amazing footage with your DJI Osmo Pocket 3! Remember, practice makes perfect. If you found this guide helpful, feel free to share it with fellow content creators. Happy filming!
For more tips and tricks on using the DJI Osmo Pocket 3, check out our other resources!
Return To Blog
Blog Posts
Pretty Fabulous YouTube Channel
It's LIVE + FREE
AI Selfies 101
Never waste thousands of $$ on a photoshoot ever again
Give yourself an AI photoshoot to match any branding you have!