- Feb 26, 2022
TUTORIAL How to upload brushes to Procreate
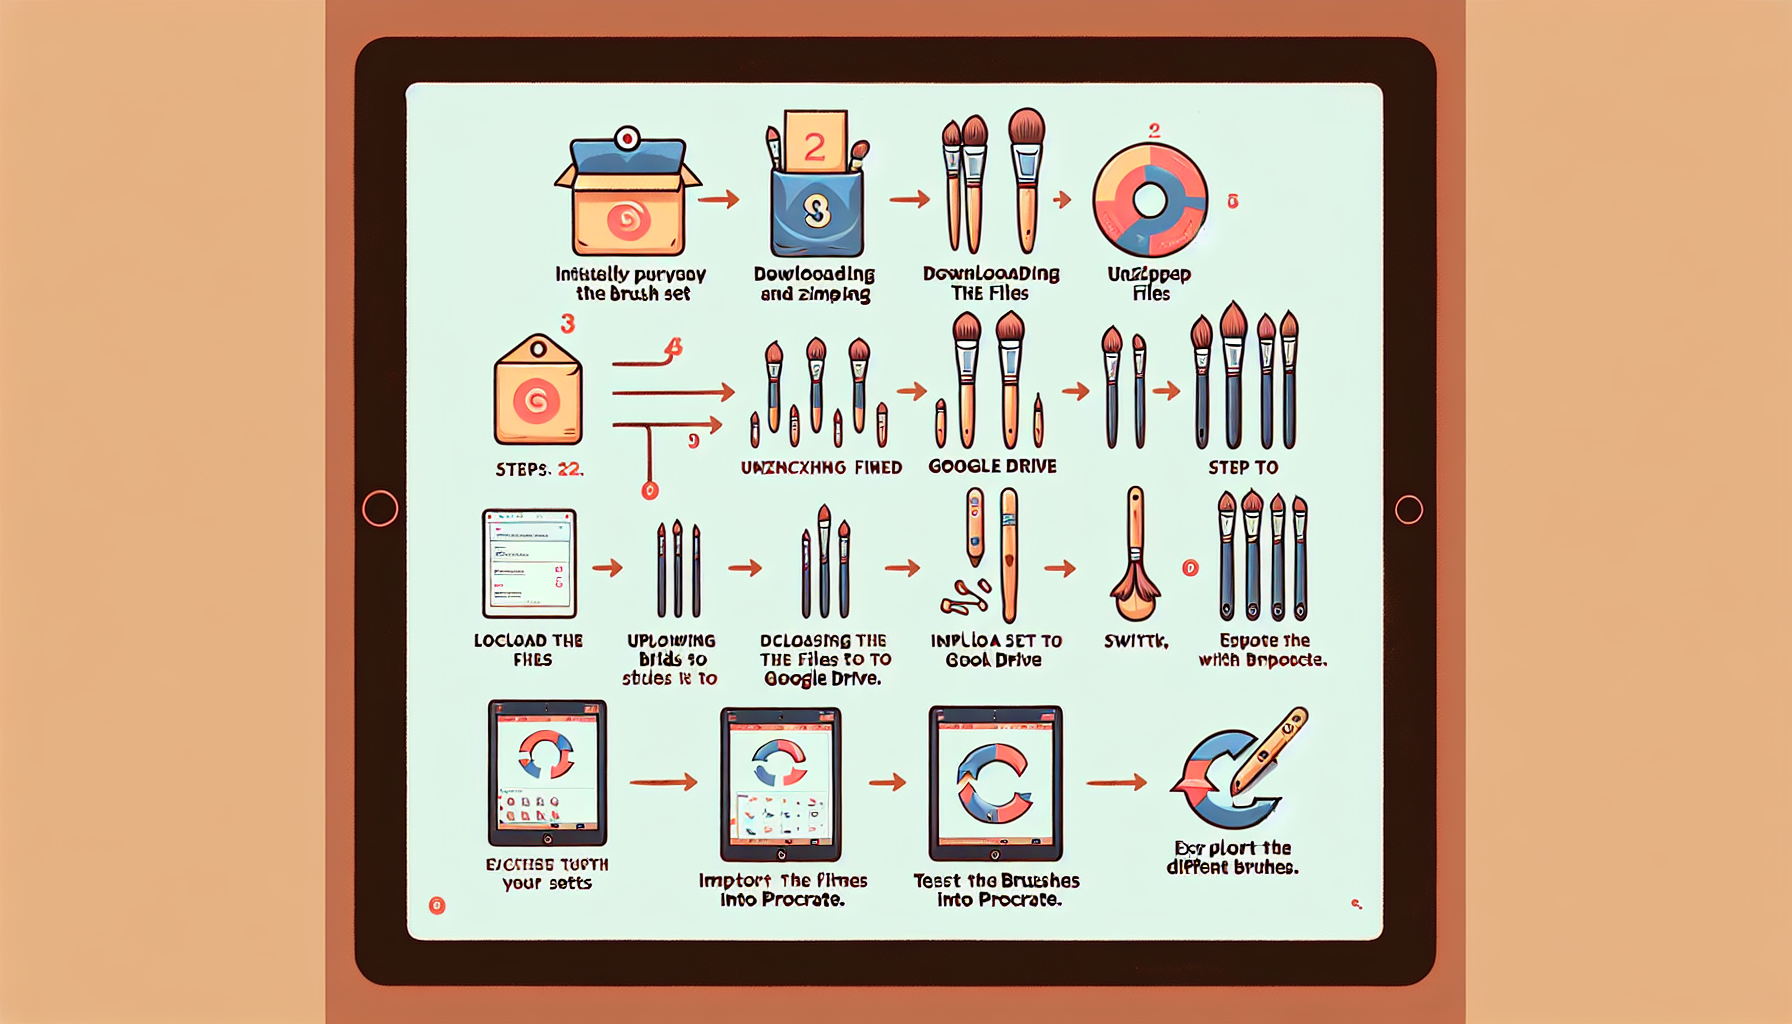
How to Upload Brushes to Procreate: A Step-by-Step Tutorial
Step 1: 🛒 Purchase Your Brush Set
Hi, everyone! Today, I'm going to walk you through the process of uploading brushes, brush sets, and Procreate files to Procreate on your iPad. Let's start from the very beginning by purchasing a brush set together.
First, I went to Design Cuts and bought the Ultimate Lettering and Clear for You Procreate Kit for $39. This package includes various brushes and Procreate files that we'll use for this tutorial.
Step 2: 📥 Download and Unzip the Files
Once the purchase was complete, I downloaded the files. These files usually come in a zip format, so the next step is to unzip them.
On your computer, locate the downloaded zip file and extract its contents. You should now see all the individual files and folders included in the brush set.
Step 3: 📤 Upload Files to Google Drive
To make the transfer to your iPad easier, we'll upload the unzipped files to Google Drive. Here's how:
Open Google Drive on your computer.
Create a new folder for your brush set.
Drag and drop the unzipped files into this new folder.
I named my folder "Procreate Kit $39" to help me remember it easily.
Step 4: 📱 Switch to Your iPad
Now that the files are in Google Drive, it's time to switch to your iPad. Open Procreate and follow these steps:
Pull up the docking station by slightly dragging upwards.
Open Google Drive from the docking station.
Navigate to the folder where you uploaded the brush set.
Step 5: 🖌️ Import Brushes to Procreate
With Google Drive open on your iPad, find the brush set you want to import. Here's how to do it:
Open the folder containing the brushes.
Select the brush set file.
Choose "Open in" and select Procreate.
Procreate will automatically import the brushes, and you should now see them in your brush library.
Step 6: 🔍 Locate and Test Your Brushes
Once the brushes are imported, it's time to locate them in Procreate and test them out. Here's how:
Open a new canvas in Procreate.
Create a new layer.
Go to the Brushes menu and find your imported brushes.
For instance, I found my brushes under "MST Brushes" which stands for Molly Super Thorpe. I specifically bought the set for the pointed pen brush, so let's test that one out.
Step 7: 🎨 Test Different Brushes
Now, let's test the different brushes included in the set. Here's what I did:
Opened a new layer in Procreate.
Selected the "MST Pointed Pens" brush set.
Tested different brushes like "Classic Pens" and "Ombre Strokes."
Remember, each brush has its unique characteristics, so take your time to explore them.
Step 8: 🗂️ Import Procreate Files
Aside from brushes, you might also want to import Procreate files. Here's how to do it:
Go back to Google Drive on your iPad.
Navigate to the folder containing Procreate files.
Select the Procreate file and choose "Open in" Procreate.
Procreate will import the file, and you can start editing it immediately.
Step 9: ✏️ Practice with Procreate Files
Once the Procreate files are imported, you can use them for practice. Here's an example:
Open the imported Procreate file.
Create a new layer for practicing.
Select a brush and start tracing or drawing.
For instance, I used a practice sheet to trace letters and test different brushes like the "Super Flex Pointed Pen."
Step 10: 🔄 Repeat as Needed
If you have multiple brushes or Procreate files, repeat the above steps for each one. This ensures that all your tools are available in Procreate.
Remember, the more you practice, the easier it becomes to navigate and use Procreate effectively.
Conclusion: 🎉 Enjoy Your New Brushes
And that's it! You've successfully uploaded brushes and Procreate files to your iPad. Now, you can enjoy creating beautiful artwork with your new tools.
I hope you found this tutorial helpful. Happy creating, and have a wonderful day!
Return To Blog
Blog Posts
Pretty Fabulous YouTube Channel
It's LIVE + FREE
AI Selfies 101
Never waste thousands of $$ on a photoshoot ever again
Give yourself an AI photoshoot to match any branding you have!